Environments Overview
Environments let you maintain separate configurations for different stages of your development workflow. Each environment has its own set of variables, allowing you to use different values for Development, Staging, and Production.
Understanding Environments
An environment is a container for variables within a project. Common environments include:
| Environment | Purpose |
|---|---|
| Development | Local development and testing on your machine |
| Staging | Pre-production testing before release |
| Production | Live application that real users access |
Why Use Multiple Environments?
Different environments serve different purposes and require different configurations:
Development
- Safe for experimentation
- Uses test/sandbox API credentials
- Debug mode enabled
- Connects to local or development databases
- Verbose logging for debugging
Staging
- Mirrors production setup as closely as possible
- Uses test data (not real customer data)
- Final testing before deployment
- Catches configuration issues before they reach production
Production
- Live, customer-facing environment
- Real credentials and production databases
- Optimized for performance
- Strict access controls
- Minimal logging
Environment-Specific Variables
Many variables will have different values per environment:
| Variable | Development | Staging | Production |
|---|---|---|---|
DATABASE_URL | localhost:5432 | staging-db.example.com | prod-db.example.com |
DEBUG | true | true | false |
LOG_LEVEL | debug | info | warn |
API_URL | localhost:3000 | staging-api.example.com | api.example.com |
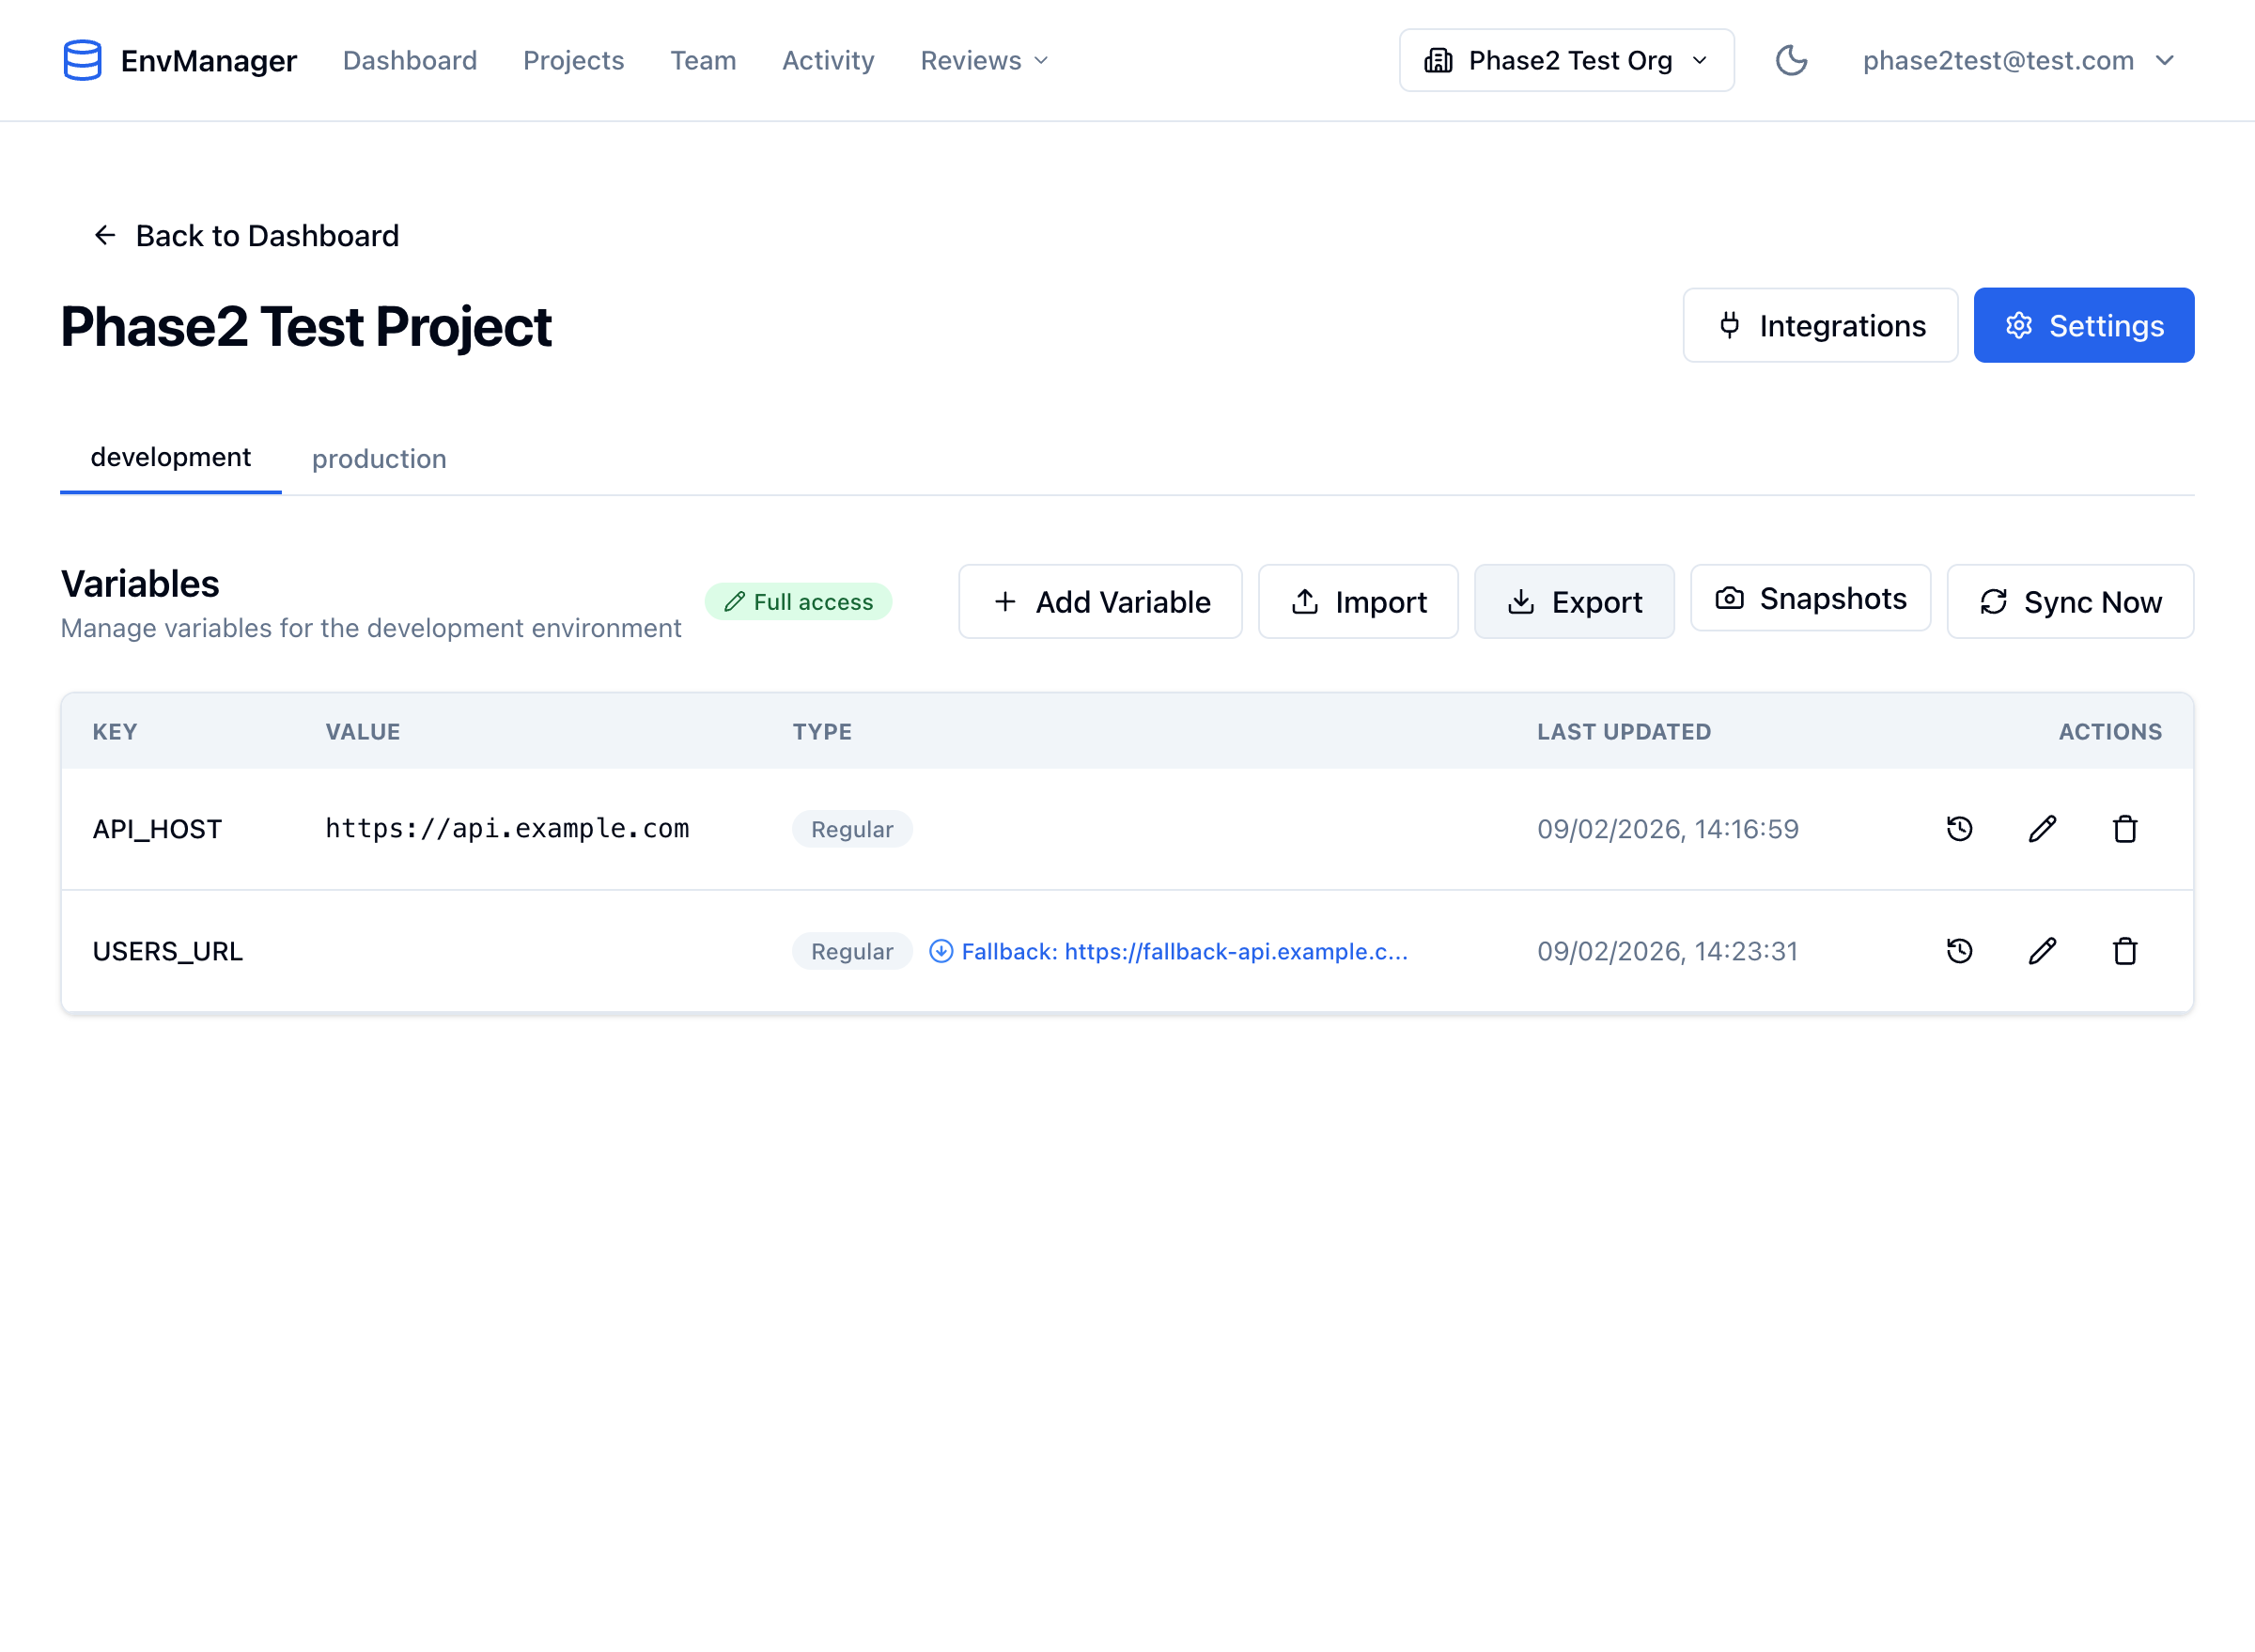
Environment tabs at the top of your project let you switch between different environments. Each environment has its own set of variables.
Default Environments
When you create a project, EnvManager offers three default environments:
- Development - Pre-selected by default
- Staging - Optional during onboarding
- Production - Pre-selected by default
You can customize these during onboarding or add/remove environments later.
Managing Environments
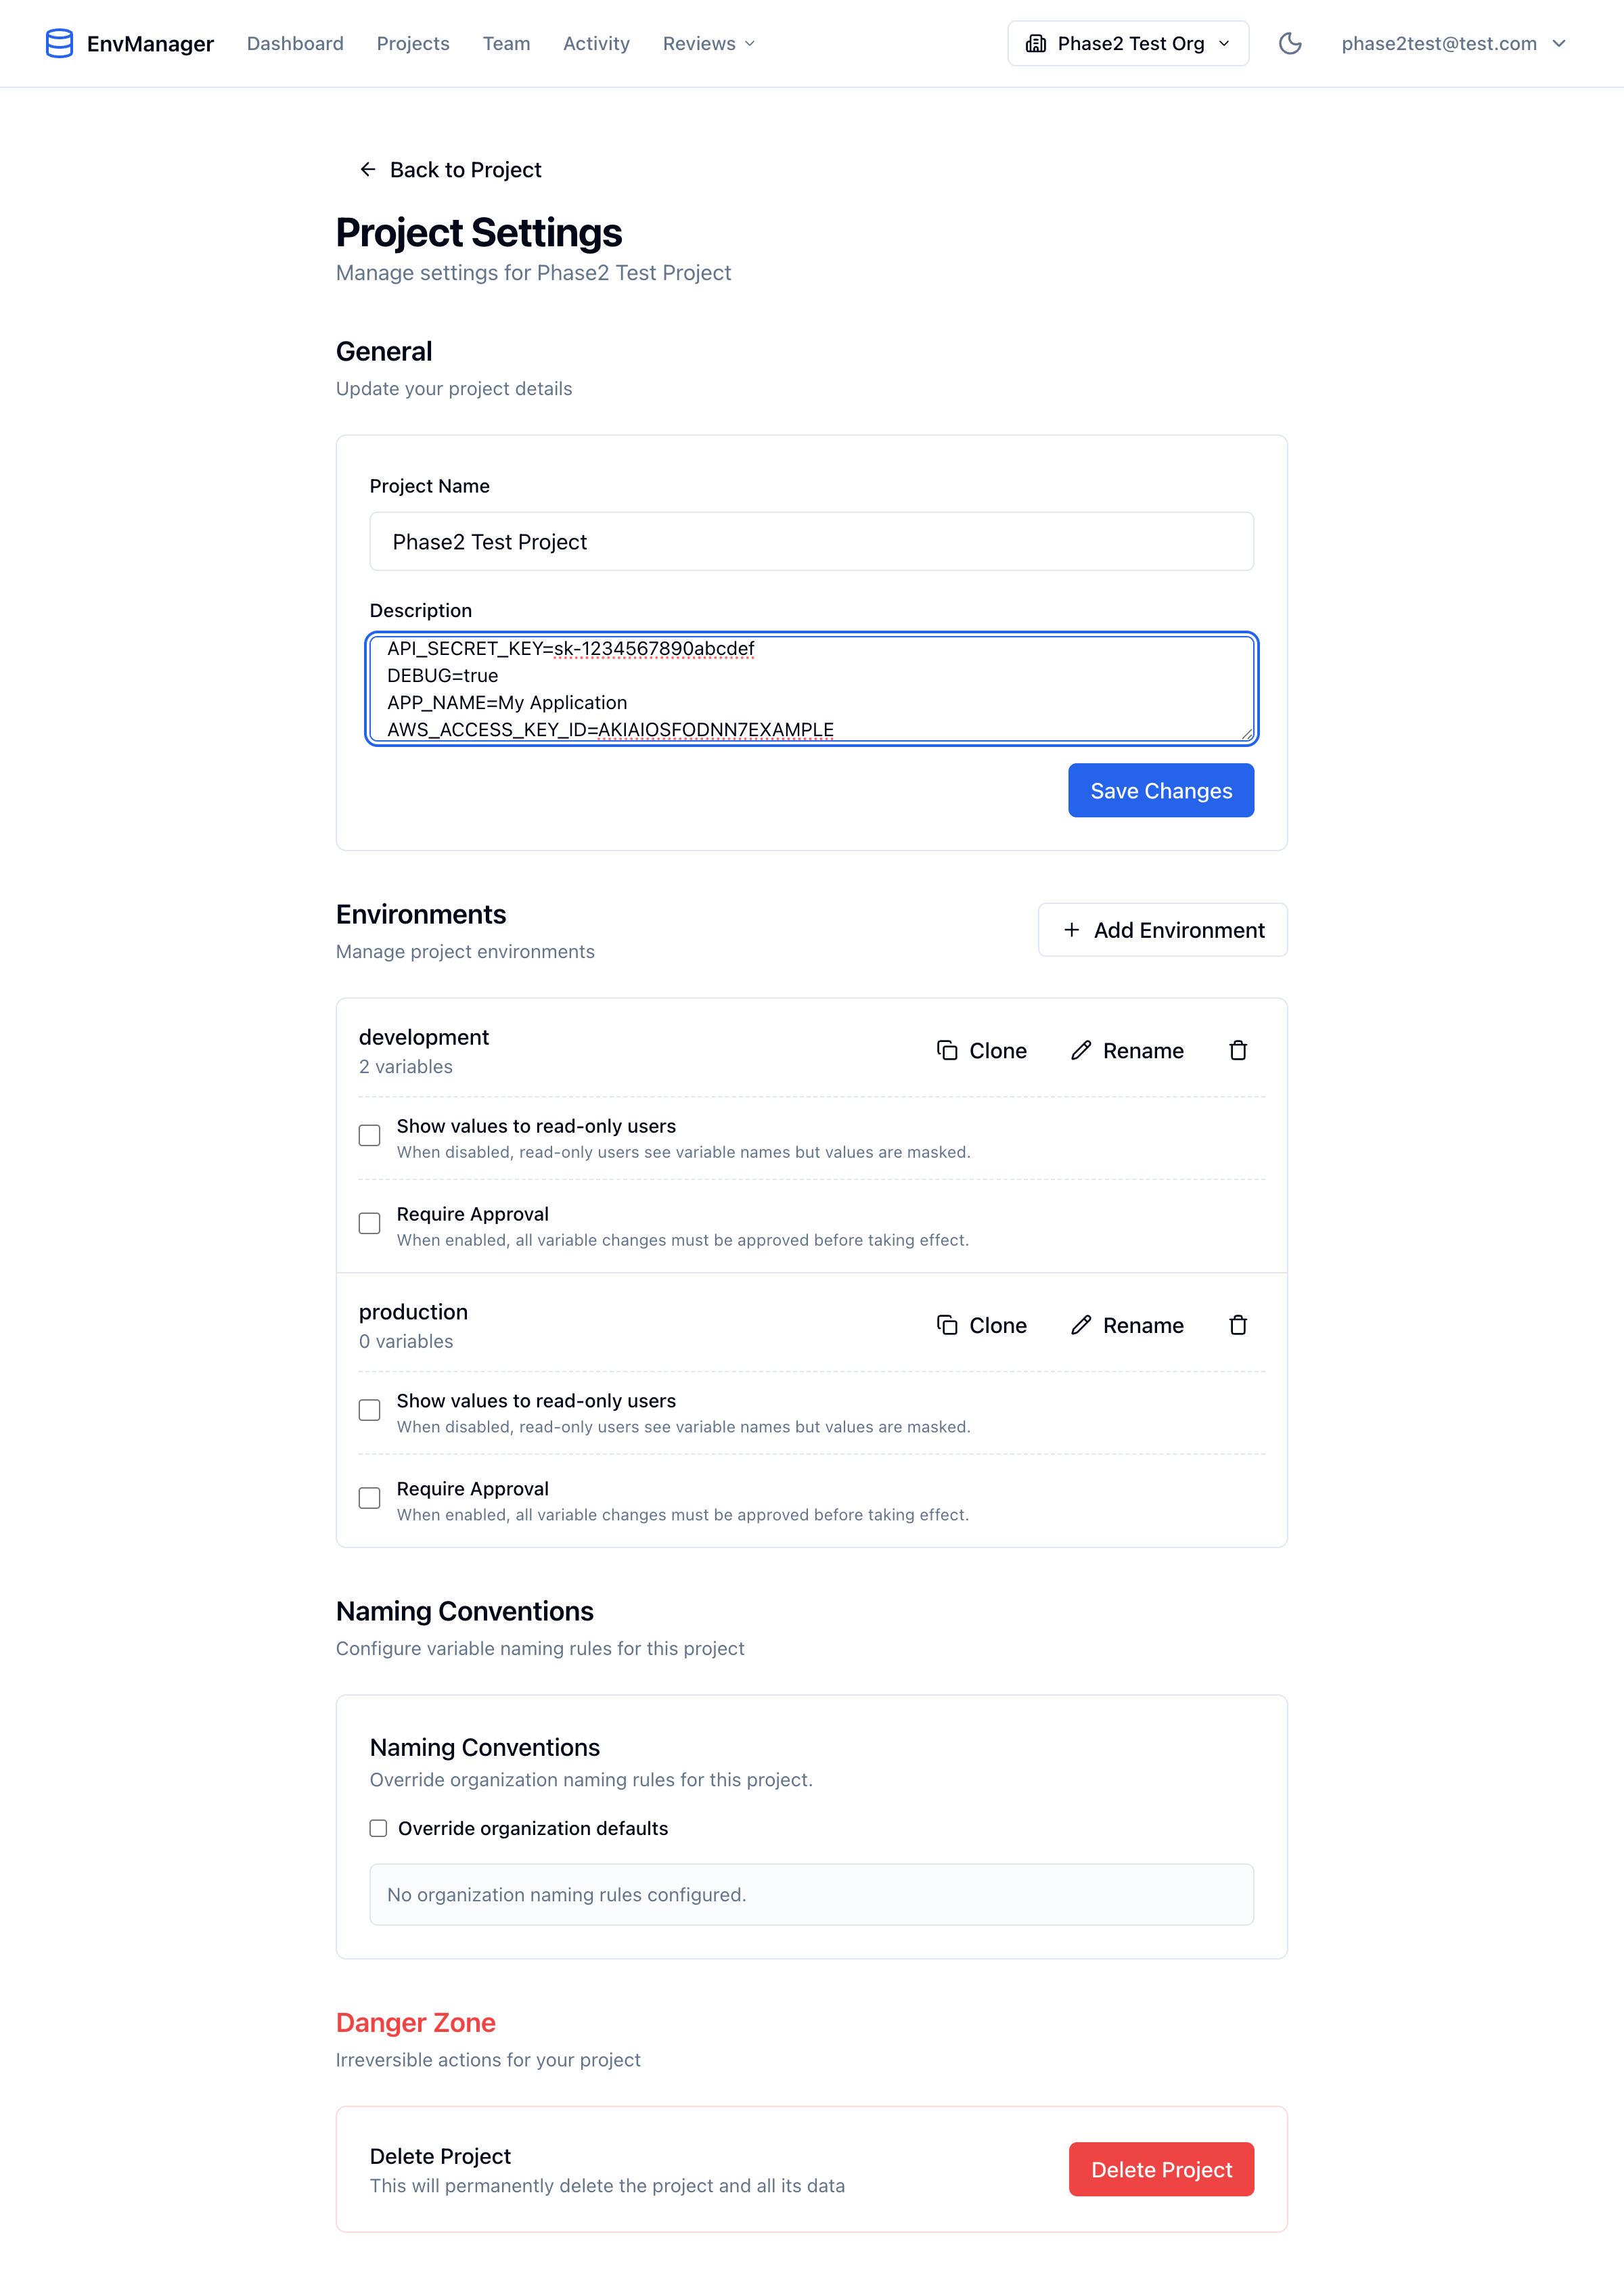
The Environments section in Project Settings lets you add, clone, rename, and delete environments. Each environment shows its variable count and configuration options.
Adding an Environment
Open Project Settings
Navigate to your project and click the Settings button (gear icon) or go to Project Settings.
Click Add Environment
In the Environments section, click Add Environment.
Enter Environment Name
Type a name for your new environment (e.g., "qa", "demo", "feature-test").
Save
Click Add to create the environment.
Renaming an Environment
Open Project Settings
Navigate to your project settings.
Find the Environment
Locate the environment you want to rename in the list.
Click Rename
Click the Rename button (pencil icon) next to the environment.
Enter New Name
Type the new name and click Update.
Cloning an Environment
Clone an environment to create a copy with all its variables. This is useful for:
- Creating a new environment based on an existing one
- Setting up a feature branch environment
- Testing configuration changes without affecting the original
Open Project Settings
Navigate to your project settings.
Find the Source Environment
Locate the environment you want to clone.
Click Clone
Click the Clone button next to the environment.
Enter New Name
Type a name for the cloned environment (e.g., "production-clone" or "feature-xyz").
Confirm
Click Clone to create the new environment with all variables copied.
Cloning copies all variables including their values. Secret values are also copied and remain encrypted.
Deleting an Environment
Open Project Settings
Navigate to your project settings.
Find the Environment
Locate the environment you want to delete.
Click Delete
Click the delete button (trash icon) next to the environment.
Confirm Deletion
Confirm that you want to delete the environment and all its variables.
You cannot delete the last environment in a project. Every project must have at least one environment.
Copying Variables Between Environments
To copy variables from one environment to another without cloning:
- Go to the source environment
- Click Export to download the variables
- Switch to the target environment
- Click Import to upload the exported file
- Review and import
See Importing Variables for details on handling conflicts.
Best Practices
Keep Structure Consistent
All environments should have the same variable keys. This prevents "variable not found" errors when deploying:
- When you add a variable to Development, add it to all environments
- Use placeholder values if the real value isn't known yet
- Review environments periodically to ensure they're in sync
Use Different Credentials
Never share sensitive credentials between environments:
- Development should use test/sandbox API keys
- Production should have its own unique credentials
- Rotate production credentials separately from other environments
Test in Staging First
Always deploy configuration changes to Staging before Production:
- Update variables in Development
- Test locally
- Push the same changes to Staging
- Verify in Staging
- Only then update Production
Restrict Production Access
Limit who can view and edit Production variables:
- Use environment-level access control
- Only senior team members should have Production access
- All Production changes should be logged and reviewed
Document Environment Differences
Note why certain values differ between environments:
- Add descriptions to variables explaining environment-specific choices
- Document any special configuration requirements
- Keep a changelog of environment configuration changes
Next Steps
Variables Overview
Learn how to create and manage variables in your environments.
Roles & Permissions
Control who can access which environments.
Import Variables
Bulk import variables to quickly set up environments.